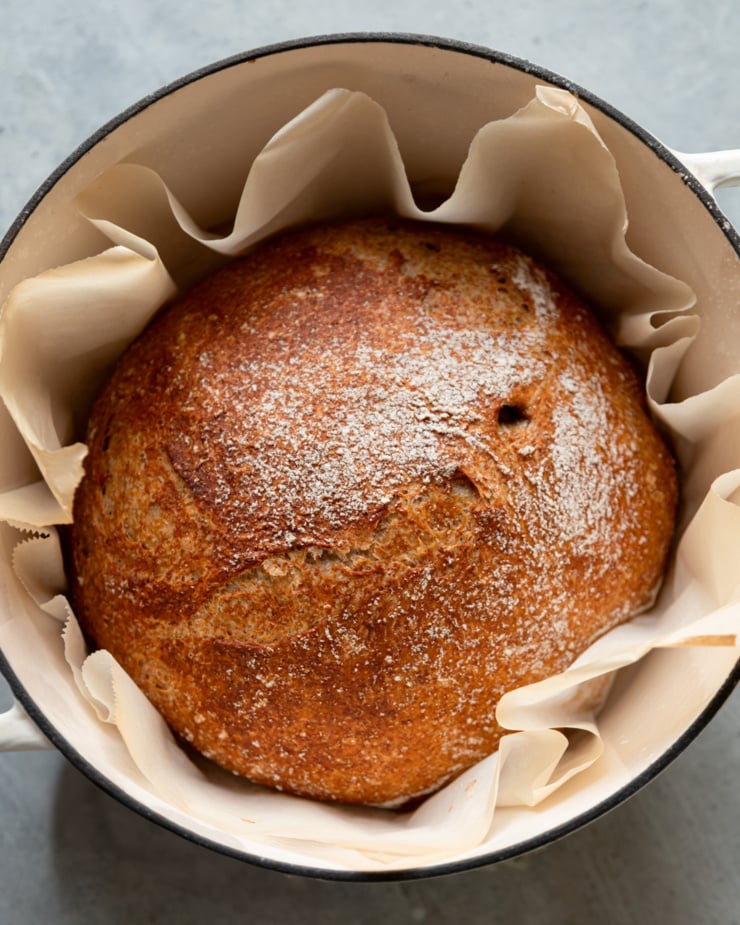
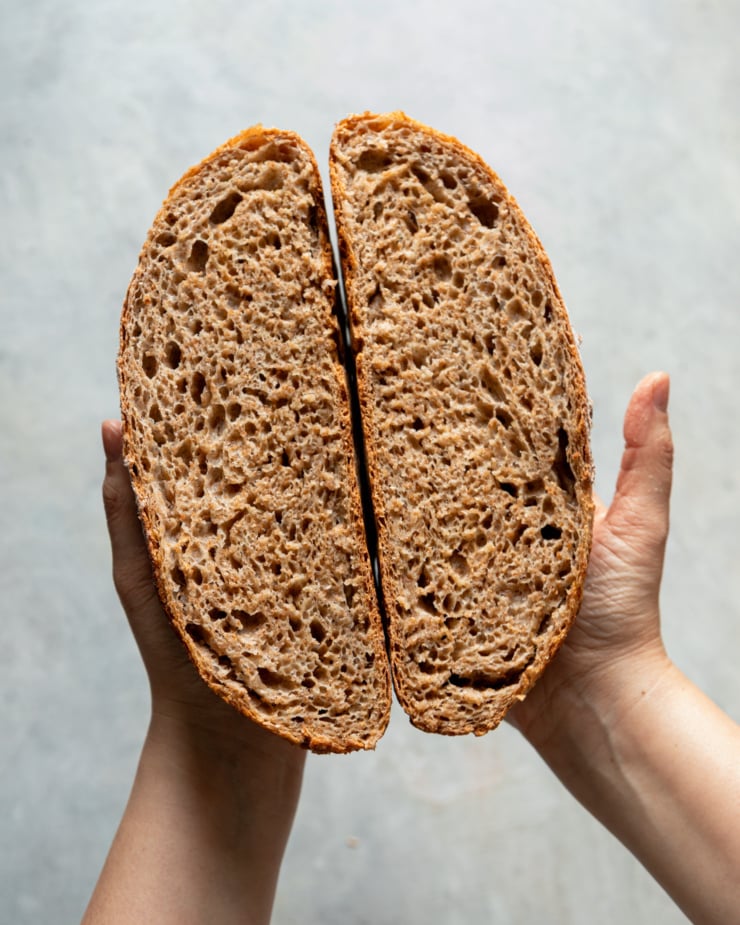
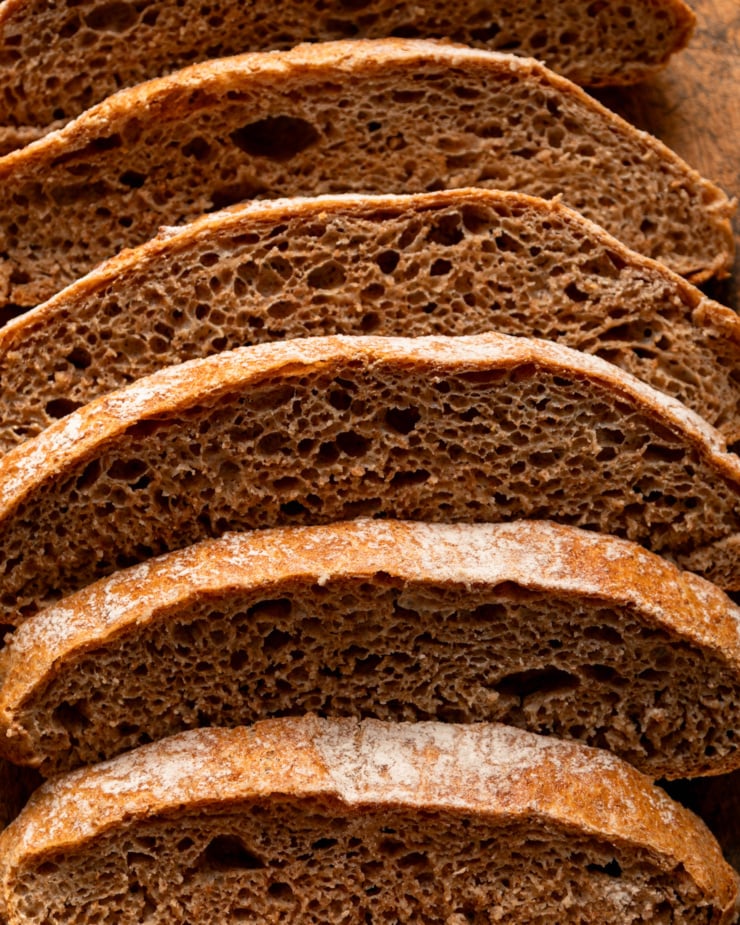
There is nothing like a crusty, fresh loaf of bread with a hot bowl of soup. This no-knead whole wheat bread is perfect for dunking into my Smoky Lentils and Potatoes Soup or Brothy Beans. I use 100% whole grain wheat flour in this recipe. With a few tricks, the loaf is tender with a slightly open crumb and satisfying crispy crust. You simply stir up the ingredients the night before, shape and do a quick rise the next day, and then bake it in a Dutch oven. No kneading or mixers needed!
I have been making Jim Lahey’s famous no-knead bread for years, generally with a 50/50 mix of all purpose flour and something whole grain. There were a few attempts with all whole wheat flour, but the results were always a little too dense for my liking.
It was my goal to lock down a whole grain no-knead wheat bread. I recommend serving so many of my recipes with crusty bread, so I wanted something to point folks to.
I began researching ways to make whole wheat bread more open-crumbed. This led me to a technique called autolyse, which involves mixing a portion of the flour and water and letting it sit for up to 1 hour. This rest improves the dough’s ability to stretch, which leads to a puffier, more springy inner texture. No whole grain bricks here!
The other additions to this no-knead whole wheat bread recipe that make it more tender are slightly higher hydration, molasses, lemon juice, and oil. Whole wheat flour absorbs more water than all-purpose, so upping the water made sense. Molasses is good at absorbing and retaining moisture in bread–it also just tastes good with whole wheat flour. Lemon juice increases the elasticity, which allows for a better rise. Oil really helps to soften the inner texture.
I have never made a homemade whole wheat bread with a dough texture like this one! It’s quite wet and you may doubt yourself as you bring it together. I recommend reading the recipe instructions thoroughly and watching the loaf-shaping video that I linked to in the recipe notes. No-knead doesn’t mean no work ;)
No-Knead 100% Whole Wheat Bread (Puffy with a Crisp Crust)
Ingredients
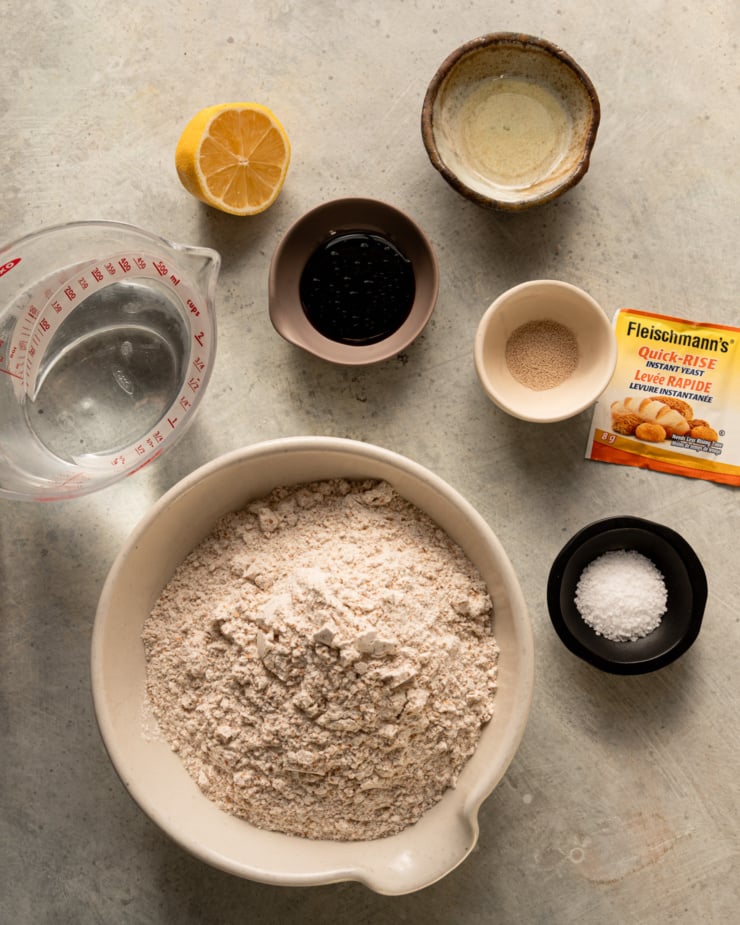
- 3 cups (390 grams) whole wheat flour, divided (plus extra)
- 1 ¾ cups (415 mL) room temperature water, divided
- 1 ½ teaspoons salt
- ½ teaspoon instant yeast
- 1 tablespoon oil (olive, sunflower etc)
- 1 tablespoon unsulphured molasses
- 2 teaspoons lemon juice
- 3 ice cubes, for baking
Equipment
- Bench Scraper
- 5 qt Dutch Oven
Notes
- You might second guess yourself while making this. The dough will seem too wet and sticky, especially at the shaping stage. Trust the process and do your best!
- A bench scraper is essential for shaping this loaf! I have this one. If you are new to this technique, I recommend watching this video first.
- I used a pricier brand name whole wheat flour as well as a cheap store brand in my tests. Both performed great!
Instructions
Please read through all instructions before proceeding.
Make the autolyse:
- In a large glass/ceramic bowl, combine 2 cups of the flour (260 grams) and 1 ½ cups (350 mL) of the water. Use a rubber spatula to stir these ingredients together thoroughly. Cover with plastic wrap and set aside for 1 hour.
After 1 hour, finish the dough:
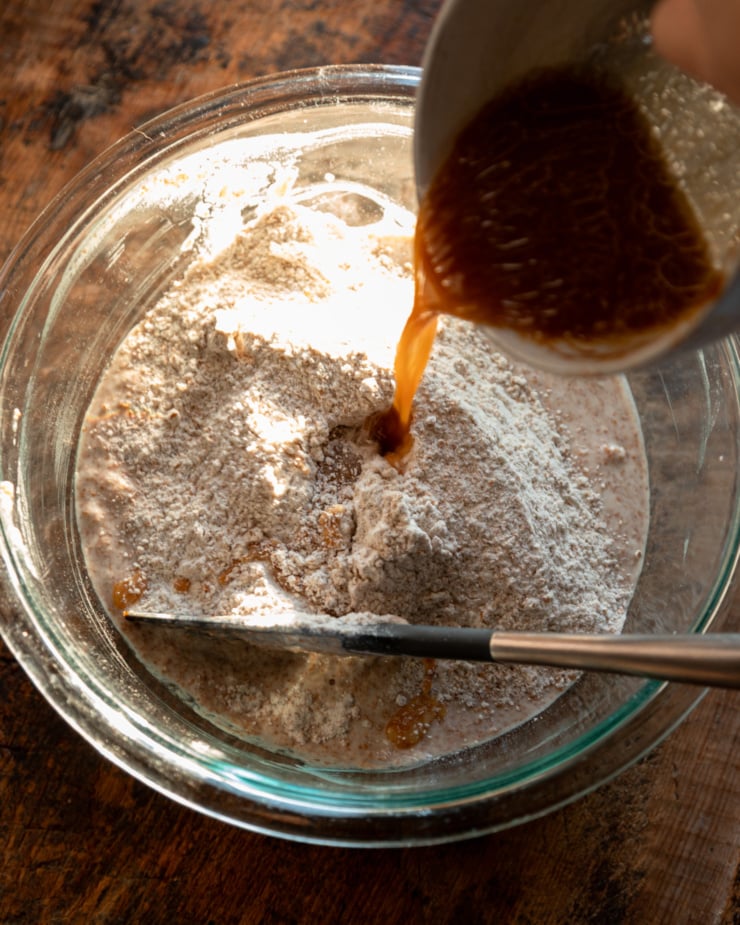
- Pour the remaining ¼ cup (60 mL) water into a small bowl. To the water, add the salt, instant yeast, oil, molasses, and lemon juice. Whisk thoroughly to combine.
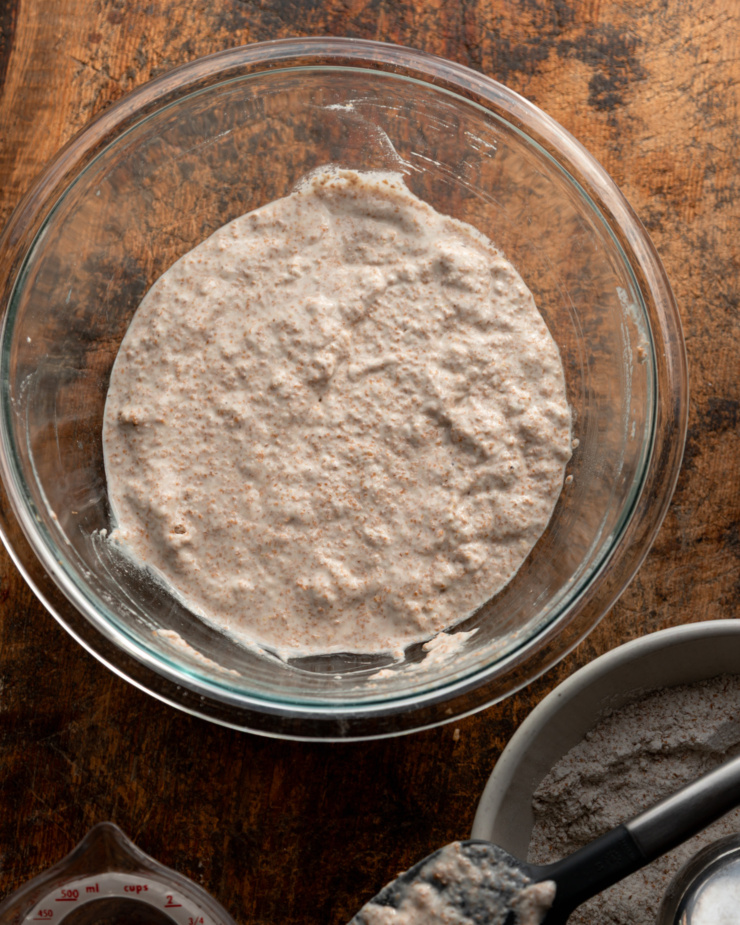
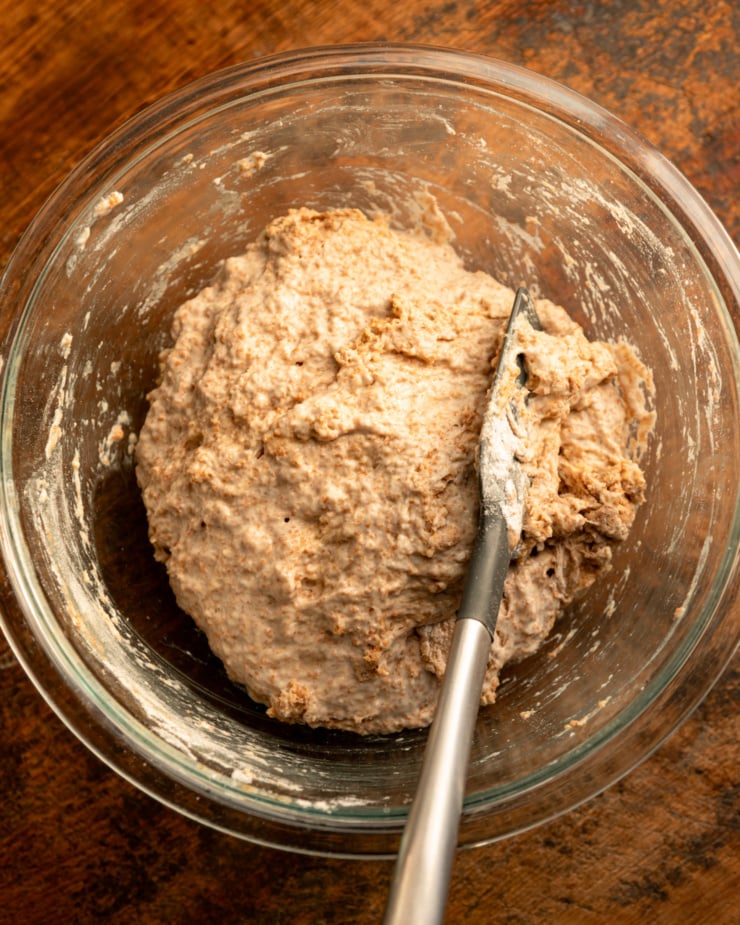
- Remove the plastic wrap and set aside to reuse. To the autolyse, add the remaining cup (130 grams) of whole wheat flour as well as the salt, yeast, molasses etc. mixture that you just whisked up. Use the rubber spatula to stir/fold everything together until a uniform, fully incorporated dough is formed. This should take about 1 minute. Cover tightly with the plastic wrap, and leave it out on the counter for 12-18 hours (my kitchen is around 67°F).
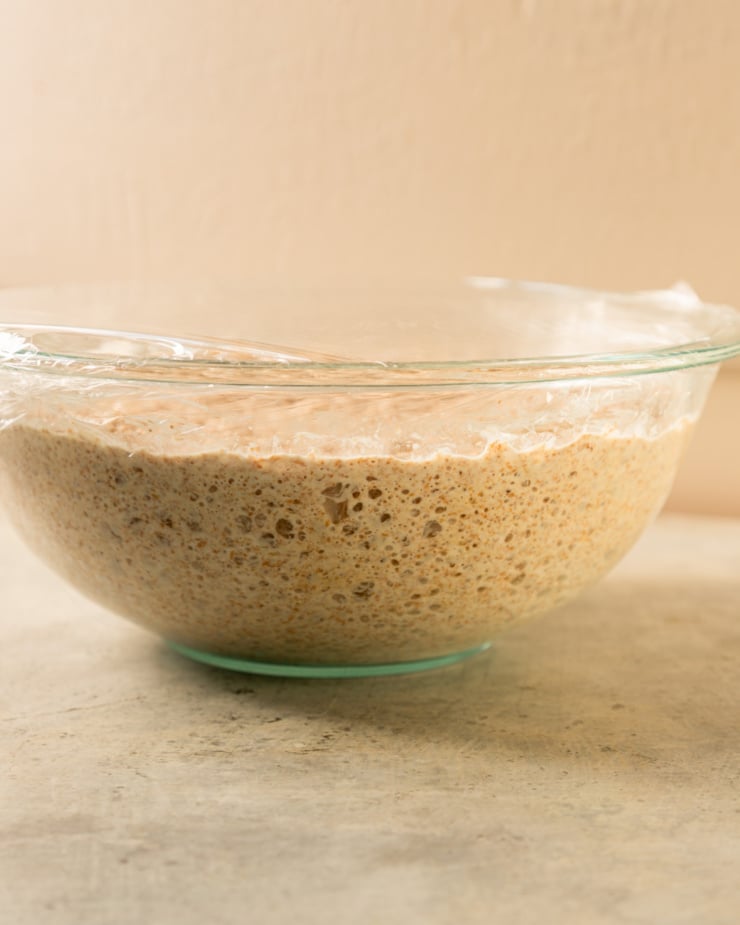
**12-18 hours later** Shape the dough:
- The dough should be doubled in size with lots of little bubbles on the surface.
- Rip a piece of parchment paper that’s large enough to hold/carry the dough like a sling. Place it near your dough shaping work area.
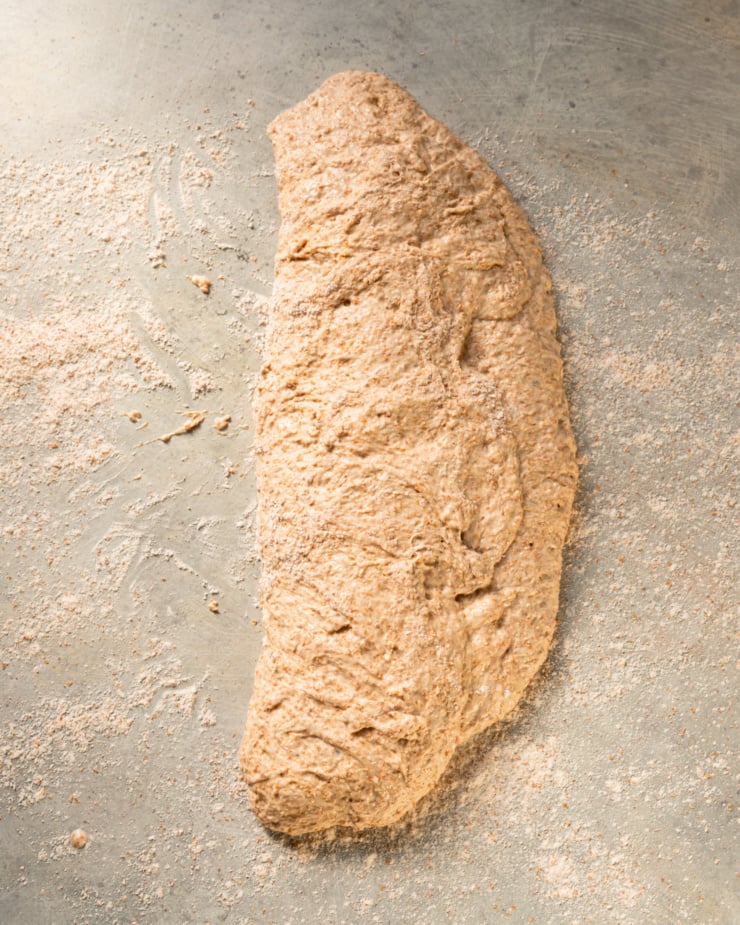
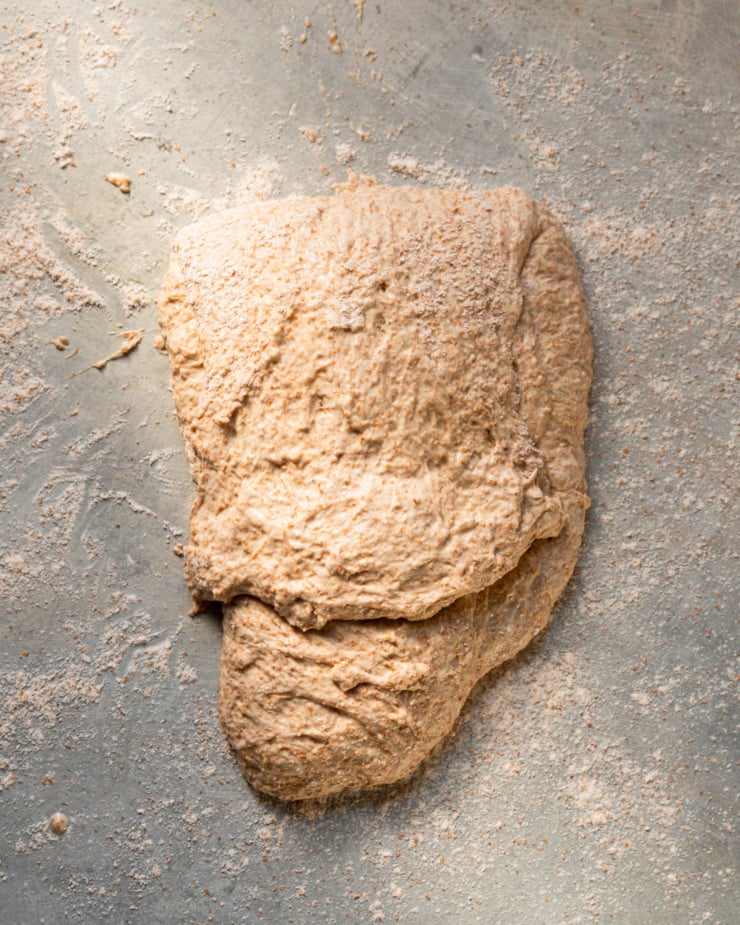
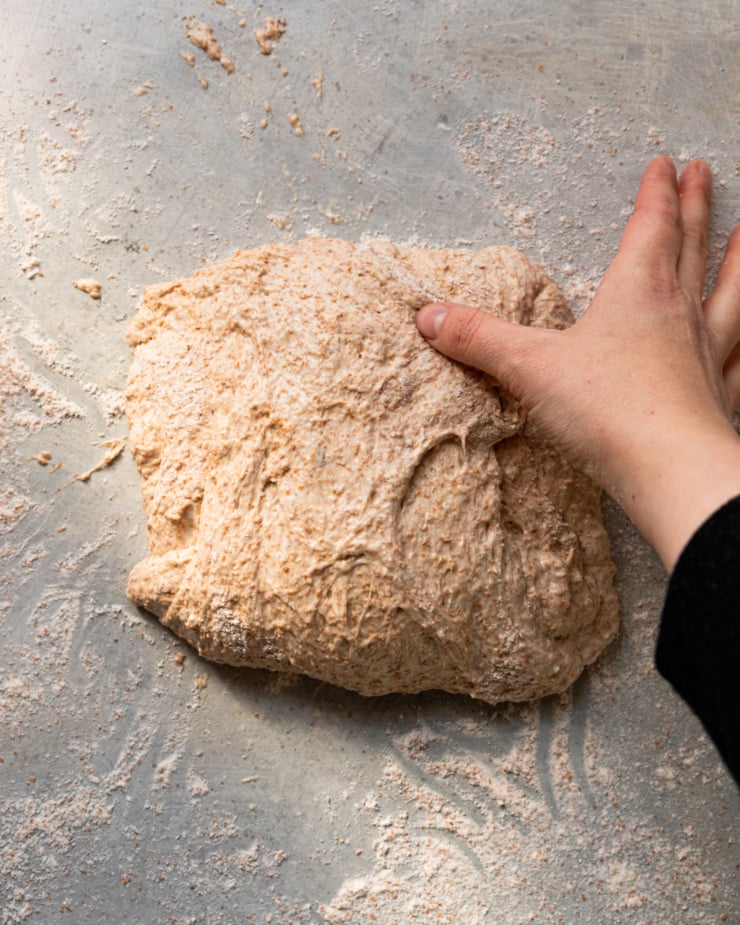
- Flour a working surface generously with whole wheat flour. Dump the very wet and sticky dough out onto the floured surface. It should start spreading out quite a bit. Flour your hands and fold the dough in half lengthwise (across the long side). Then, take one short side of the dough and fold it into the center. Repeat this fold with the other side, closing it over the two previous folds.
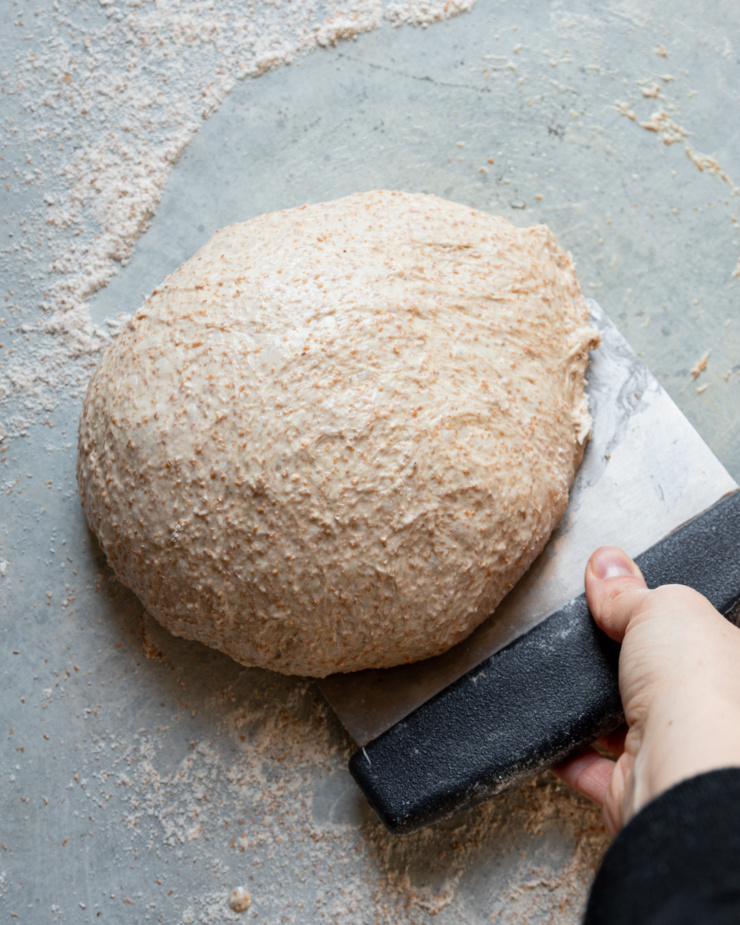
- Flour your hands again and flip the dough over. Dust some flour on top of the loaf. Using a bench scraper, shape the dough into a ball with surface tension on the top (see note). This dough is quite sticky, so just do your best.
- Transfer the shaped dough to your parchment and dust a bit of flour on the top (I use a little fine mesh sieve). Cover the dough with your plastic wrap. Let it puff up for 1 hour.
Bake the bread:
- With about 30 minutes left on the resting time, place your Dutch oven (with the lid on) in the oven. Close the door and preheat to 450°F.
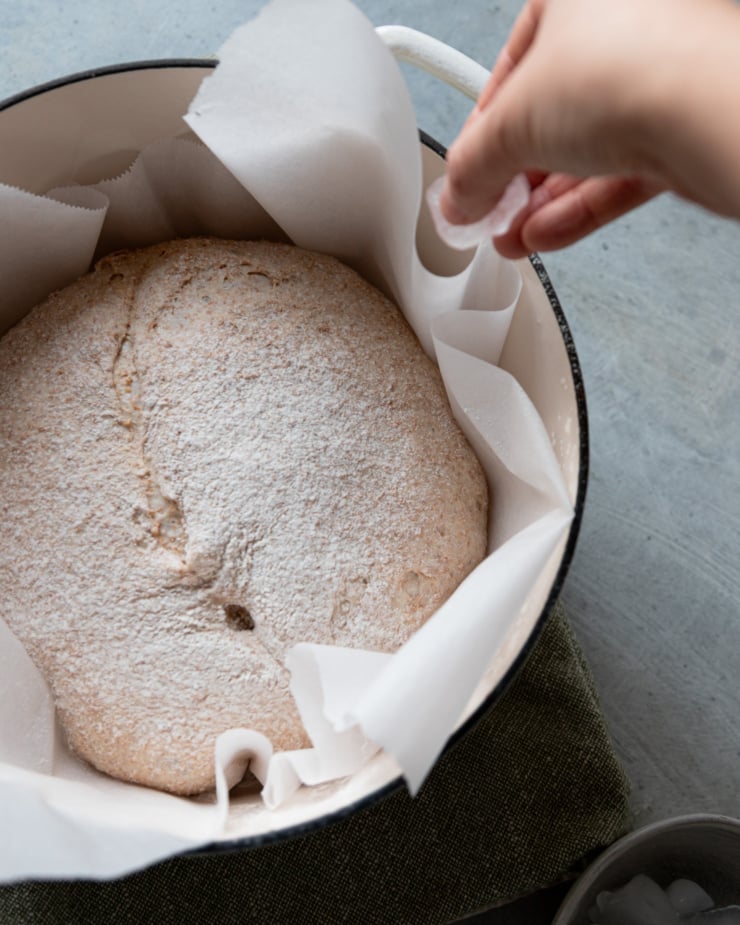
- Once the full hour is up, uncover the dough. Dust it with a bit more flour if you like and cut a long slit in the top with a sharp knife. Get out your ice cubes.
- Remove the Dutch oven from the preheated oven and remove the lid. Carefully, using the parchment as a “sling,” transfer the dough to the hot Dutch oven. Carefully rip any excess parchment that might crush on top of the dough once the lid is placed on top. Pop the ice cubes under the parchment at 3 equidistant points around the dough. Immediately close the lid on top.
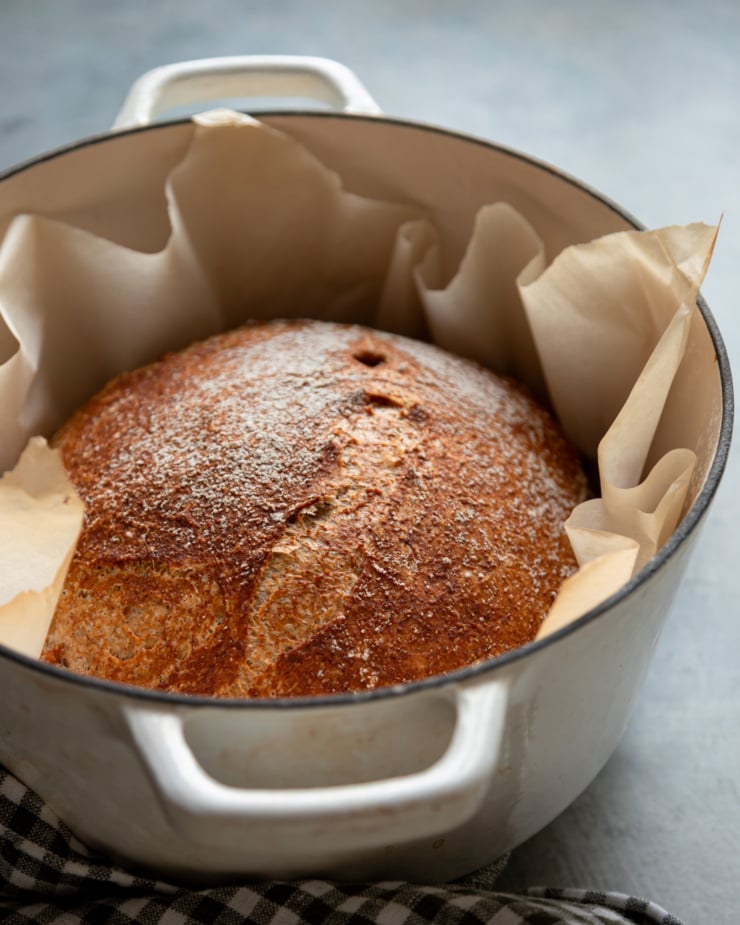
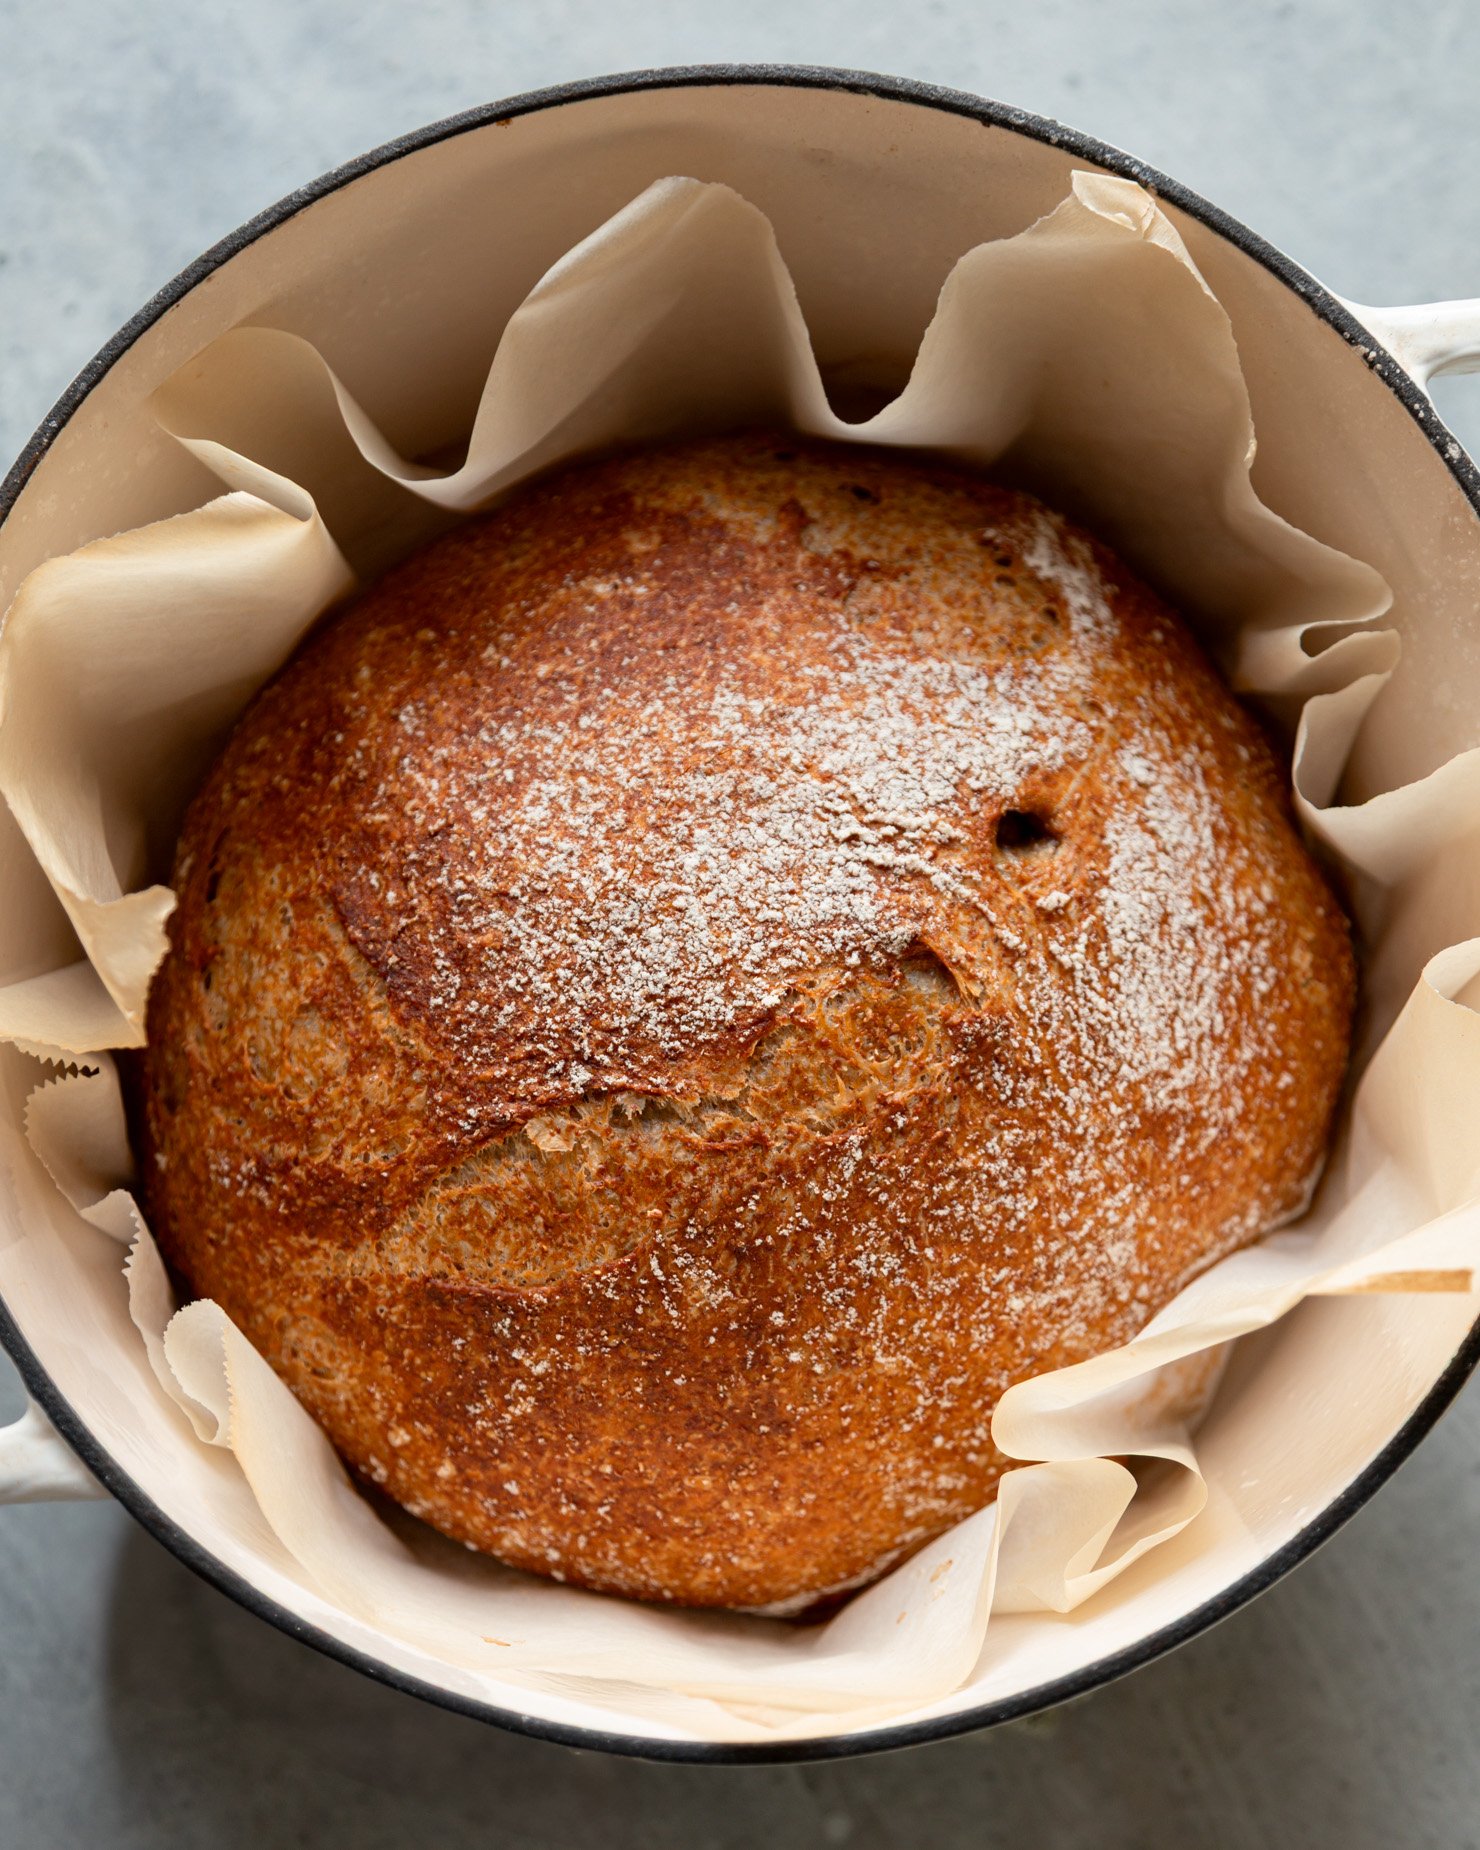
- Transfer the Dutch oven to the preheated oven. Let the loaf bake for 30 minutes with the lid on. Then, remove the lid and bake for an additional 15-18 minutes to get a nicely browned crust.
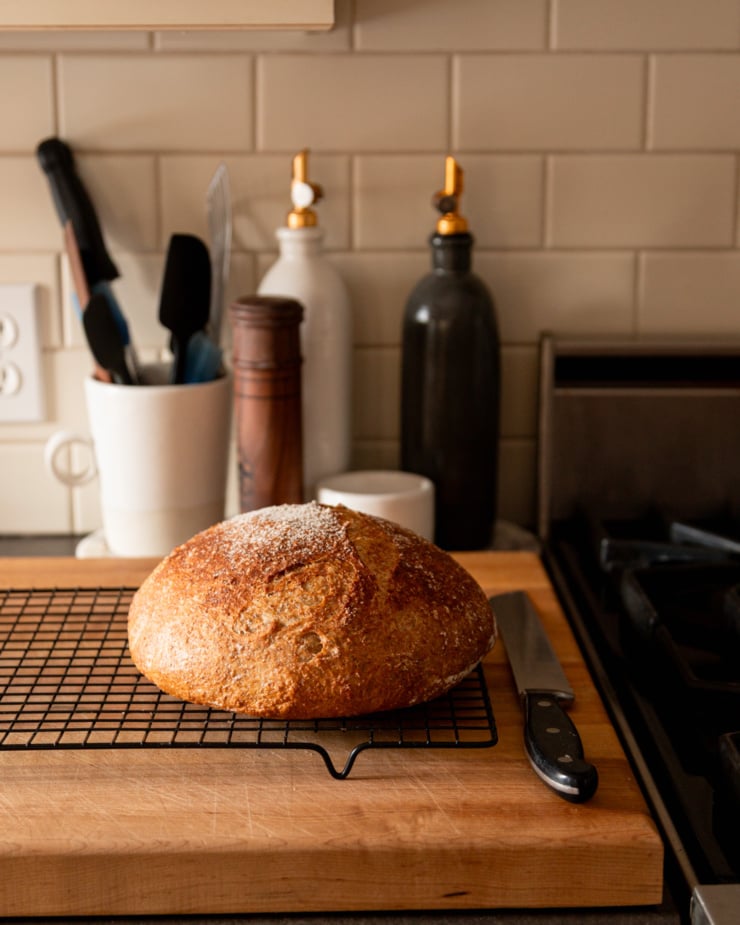
- Remove the Dutch oven from the oven and carefully transfer the bread to a cooling rack. Let it cool before enjoying!


Excellent bread! I love that it’s 100% whole grain yet not too dense. I wonder if a rye loaf could work with this method?
This was delicious and had a great open crumb, but was really hard to shape and came out flat. Do you have any suggestions for my next try?
Hi Heather I had the same experience.
My bread was delicious, a beautiful crust and springy soft bread in the middle but the loaf was flat. I tried to give it some form as directed using the bench scraper (I watched a few videos on how to use a bench scraper to shape dough) but it did not appear to do anything in this case. Still was a shapeless blob when it was time to bake. The ONLY thing I forgot was to add the ice to the Dutch oven. Did you?
Hi Heather,
I know that the shaping is difficult with this one. Do not be afraid to heavily dust your surface with flour + the top of the loaf, your hands, and the bench scraper. Whatever allows you to get as much grip with the bench scraper to create surface tension is optimal!
-L
When I made this, it was so wet and sticky, it was almost impossible to shape and fold it, even with lots of flour sprinkled over it. Also, when I put it into the dutch oven, it spread out so when it was done, it was more like a foccacia than a loaf. It tasted good though. I’m wondering if I can treat it like an English muffin loaf and bake it in a loaf pan instead?
Hi Mark,
I tried a loaf pan and did not get great results. It was kind of flat, but also uneven if that makes sense? I’m guessing this is because I could not preheat the pan like I do with the Dutch oven. It definitely is a very sticky dough that takes some practice with the bench scraper to get nice and taut.
-L
I just mixed the autolyse and am so looking forward to making this bread.
I have a question about the rise time. I have become a fan of letting dough rise for 24-36 hours (including 100% whole wheat recipes) because I love the resulting sourdough taste with a longer rise. Have you tried that with this recipe? Thanks
Hi Anne,
The longest I went with this one was 20 hours and it was great! Noticeably more tangy for sure. I think you would be fine to go a full 24 hours.
-L
Can unsulphured black strap molasses be used?
Yes it can in this recipe!
-L
Absolutely amazing! I am very new to bread making and was a bit concerned with the stickiness of the super wet dough after the 12 hours. But I managed to still fold and pull some tension using the bench scraper (a godsend!) with quite a bit of flour added in the second fold, and the end result is so good – airy, moist inside and crusty outside, the nuttiness of the whole wheat and caramelized tone from the molasses!!! I did 30 minutes with the lid on and 18 minutes with the lid off. I know I can trust every recipe from Laura!
What size Dutch oven is used for this recipe?
5 quart!
I can’t find molasses anywhere in France, anything I can use instead?
If you eat honey, it’s a great substitute here! Dark corn syrup or maple syrup are also decent options.
-L
Would like to try it with Stone ground Spelt flour. Any suggestions as far as ratio of water to flour? Thanks, Laura. I have enjoyed EVERY one of your recipes that I have tried you are an excellent chef!
Hi Beth,
I have never tried this recipe with whole spelt flour and I honestly don’t feel too confident about it. In general, spelt flour has much weaker gluten structure. If I was trying this with spelt flour, I would use the same amount of flour as stated in the recipe, but bring the water down to 1 1/2 cups. Use 1 1/4 for the autolyse step and the rest for mixing up the molasses etc. I am assuming, even with these adjustments, you will wind up with a flatter and more dense loaf. If you have vital wheat gluten on hand, you could add 1-2 tablespoons after the autolyse step. This ingredient helps with elasticity and puff, but is not 100% whole grain.
-L
Thank you, Laura, I appreciate your response. I think I’ll stick with your recipe as is why alter a good thing!!
Definitely going to try this! I regularly make no knead loaves with all purpose flour & it always comes out great. Do you think your recipe would work with rye flour too?
Hi Pat,
Similar to what I responded with Beth’s comment about using whole spelt instead, I don’t think rye flour is an appropriate 1 for 1 substitution. It has a much lower gluten content than whole wheat. You could cut in maybe 20% rye flour, but I would not recommend doing the whole thing. It would be quite dense and different from the loaf I shared here.
-L
I’m grateful that you share your knowlege and experience! Your blog is a treasure trove for me and I look forward to your posts each week.
Looks great!
I have a big package of rye flour on hand, wondering if I can use this instead of wholewheat?
Hi Laura,
Re-sharing the reply that I posted to Pat’s comment here: I don’t think rye flour is an appropriate 1 for 1 substitution. It has a much lower gluten content than whole wheat. You could cut in maybe 20% rye flour, but I would not recommend doing the whole thing. It would be quite dense and very different from the loaf I shared here.
-L
Just baked this morning. Absolutely everything as described. Used regular
Grocery store whole wheat flour. Taste and texture of final Product was fabulous. Going into regular
Rotation! Thanks for all trial and error to come up with this!
What a beautiful texture on this loaf–and all whole wheat. Am a fan of the autolyse method, and have tried it a few times with success. But always 50/50 white/whole grain,. Going to try with all whole grain. Thanks!
Thanks, sounds great..definitely worth the effort I feel. Problem might be in finding the right flour.
Hi Tony,
I’ve been able to find whole wheat flour at pretty much every grocery store in my area–from higher end shops to discount food stores. Hope you can find some!
-L